Showing posts with label owl. Show all posts

Tuesday, September 19, 2023

Another Birthday - One page Scrapbook Layout

How is it the middle of September??? Of course, my favorite month and season is suddenly upon us, and seems like it is slipping away too quickly. 

Yesterday was my birthday! Yikes! Those keep rolling like a slot machine, but I'm so grateful for each day and year the Lord gives me. We celebrated by eating Mexican together, followed by cake and ice cream at our house. Our big kids and their wives were tossing the football in the yard. It touched my heart to see them having fun together. It was my favorite part of the day! Our 9 year old grandson is building some great skills at throwing and catching the football too. You should have seen the smile on his face!

In honor of my birthday, I'm posting a layout from a few years back. Why do I scrapbook my own birthday? Well, because some day, these photos might mean something to the generations to come. I hope they do, but if they don't....I still had fun scrapping and preserving them. These pics are from my birthday 3 years ago. 

Peanut butter pie is one of my favorite desserts. Actually, anything with that combo is probably on my faves list. We had homemade ice cream to go with! Also... note that pictures of people blowing out their candles are rarely very flattering. :)
The paper is from Glitz Design along with several miscellaneous vintage looking scraps from my scrap stash. Peep the owl!! I've been crushing on owls ever since my now 11 year old granddaughter's nursery had an owl theme. So cute!

Well my birthday is a wrap and it's back to the grind of normal life, without all the spoiling. Enjoy the cooler weather, and break out your booties, sweaters, and pumpkin spice. Fall is here!!

Wednesday, October 7, 2020

Brithday - One Page Scrapbook Layout

 I'm working on doing a better job of showing up in some of the photos that I scrapbook. The bright side is I can just scrap the ones that I like. But if I never hand anybody else the camera, there won't be any documentation of my milestones in life. I'm grateful that my husband and family think about this. 

I recently celebrated yet another birthday, but this layout is from September, 2018. I'm thankful for every birthday the good Lord sends my way. I'm grateful for strength and overall health, and for a beautiful, loving family to celebrate with. 
Not sure why I didn't put a title on here, but it would definitely be "Older and Wiser". None of us are even close to perfect, but we are all on our way, and God hasn't given up on us, in spite of our daily missing the mark. 

I don't remember the paper that I used, but the vintage look and numbers are very fitting considering I'm kind of a vintage girl! I love owls, and like the way these two black owls set off my black shirt. I added a few mini flowers (SU punch), a tag with the date, washi tape, chevron arrow from my stash, and Cricut journaling.

 Hope this inspires you in some way!! Thanks for stopping by!

Friday, July 3, 2020

Kids' Birthday cards - Boys

It's been a long time since I've shared any of my cards. I will say right up front, that card-making is much harder for me than scrap booking. I haven't figured out why. That being said, I think these turned out pretty cute. The main thing is the kids enjoyed receiving them.

I made this one (above) for my grandson on his 6th birthday! He has a favorite "Foxy" stuffed animal, and he even has a raccoon that he carries around sometimes. I'm the one that loves the owls!! :) The black and white checked scrap paper at the bottom helped ground it all, and I doodled the border around the edge to frame it.
I made this one for the son of a friend of mine who was also having a (Covid) birthday around the same time. Again...the scraps! I use scraps so often when I'm making cards. Don't look too closely at froggy...He could be colored more beautifully. But, I'm sure it was still enjoyed by the receiver and it was fun for me to make it.

Hope you have a great weekend!!

Sunday, May 3, 2020

Owl birthday cards

I've been making a lot of birthday cards lately, so I thought I would share a few! I'm not a huge fan of coloring in stamps, nor am I very good at it. However, I'm not too proud to share them anyway. Where are my owl fans?? Anybody?
 I made the purple card for a friend whose daughter was having a Quarantine birthday and was asking for cards to make it a special day. The pink one below is for my sweet 8 year old granddaughter! She asked me some questions and wanted to know how I made it. She's a crafty little one, and I can't wait until we can spend some quality time creating together.
As mentioned above, I'm really kind of bad (inexperienced) at coloring stamps. I used Stazon for the stamp outline and a blending pen with SU ink to color the owls. For some reason, the pink owl turned out a little splotchy in the middle, but it's okay. She loved it and that is the main thing. I did the purple one second and that one turned out a little better. I used some patterned paper scraps down the center of the card, cut out the owls and popped them up with adhesive foam, and added the sentiment banners below.

Thanks for stopping by my blog today! Hope you enjoy your weekend!

Thursday, February 6, 2020

Family is Forever - Two Page Wedding Scrapbook Layout

The lighting outside of the chapel after the ceremony was so amazing. There were some clouds starting to roll in, but it couldn't have been better for the outdoor family pictures.
 I kept the layout simple, matting the photos in the same color as the bridesmaids' dresses. The pretty floral was perfect to add a little pizzazz and balance the page, along with the owl embellishment that came with the paper.  I am so happy that my DIL's sweet Grandma was able to be there for the wedding and for this precious photo. Sadly, she has now passed on, but this page will help keep her memory alive.
 Are you lovin' this title? I thought it was perfect for the page. I sized it in Design Space to fit the corner of my page and cut it with my Cricut in colors to match the wedding party. I also used my Cricut to write out the quote.
Oh my word, I love owls so much! I know the craze is pretty much over, but I don't care.😍
Thanks for stopping by my blog today! Have a very crafty and productive week!

Sunday, July 21, 2019

Two Page Scrapbook Layout - "Family Fun"


Here's another layout from our extended family time in Michigan two years ago. We had such a great time being together, even though we had a full house!
Here we are gathered in the living room just being together and enjoying a meal on the porch. It doesn't get any better than this.
 Great food and fun together! This is summer at it's best!
Thanks for stopping by today. My next layout will be a pool layout, so be sure and stop back for more family fun layouts.

Wednesday, October 26, 2016

Two Page Scrapbook Layout - "Happy Halloween"

Who is ready for Halloween? It's almost time! It's tons more fun now that grandkids are in the picture. We're invited to follow along the trick or treating trail with them and enjoy the experience first hand.

Here's a layout from 2014 of our cute little owl and pirate. Aren't they just adorable? I remember being so excited to find this owl costume on sale at Cracker Barrel. Score one for Grandma!
 We had a great time and made some fun memories
 I believe the orange paper is from SU, along with some patterned paper scraps, and washi from my stash. The owl was cut with Cricut's Hoot N Holler cartridge. Who doesn't love some bats and spiders too, as long as they're not in my house! StampinUp's bitty banner punch comes in handy for the cutest little banners.
If you stop by later this week, I'll be sharing a Halloween layout from last year. See you soon!

Friday, April 8, 2016

Two Page Layout - "Just Stay Little"

If you are a new Mommy, you've probably heard more times than you'd like to remember about how fast time flies. All I can say is that it is so true, and it flies even faster with grandkids. Time is so precious and we never know how long we have.
 These two are our favorite little humans! They're not perfect, but they're pretty close. We love them to pieces. This layout features pictures of them from almost two years ago. The little man turns two years old tomorrow and he has beautiful blonde hair and striking blue eyes....a real heart breaker!
 The little princess is almost four and she has beautiful brown eyes, a smile that lights up a room, and a big imagination. She loves to play with her Grandma. She melts my heart!!
If you are a Grandma, you will totally understand what I'm trying to express. Being a Grandma is the best gig ever!

All of the paper and embellishments shown are from Glitz Design, even the owl. Thanks for stopping by my blog today!!

Saturday, March 14, 2015

Two Page Layout - "Life with you is a Hoot"

 
Here is my final (and favorite) layout from our 2013 anniversary trip to Nashville, IN. What an awesome place to get away together. This log cabin was such a treat. Here we are...still together after 28 years. =) 

We totally suck at selfies. Seriously...we took about twenty before we could stop laughing at the horrible pictures and take a few good ones. These turned out pretty cute, though. My husband is such an amazing man, and I can't imagine doing life without him. I'm truly blessed to share my time on earth with him.
 The paper is MyMinds Eye and don't you love the zipper ribbon from Close to My Heart? The cute pair of owls is from Cricut's Hoot N Holler.
Have a great day!

Wednesday, July 24, 2013

Pop Up Owl 1st Birthday Card and Altered Frame

Our grandbaby turned 1 year-old in April!! Can't believe how quickly time flies, even with grandchildren. Of course, I made her a card to celebrate!! Her nursery has an owl theme, complete with a tree mural hand painted by her Daddy (my oldest son). It's really not my fault that I have become a bit obsessed with owls!

Who doesn't love a pop-up card, especially with an owl? :) Here's the front.
Here's the inside, complete with baby girl owl and scalloped oval banner.
 If you've never made a pop-up card, it's really not hard. You'll have to check out a few of the tutorials  like this one. I didn't take pictures of each step, but basically you cut two matching slits in the fold of the inner card layer (brighter pink) for each item you want to pop up.
 You can see the slits between the owls feet. The section of card between the slits is folded towards you (the opposite of the fold in the card) which creates a stand for this baby owl.  It's really as simple as that. I used stickers for the sentiment. I used pink glitter cardstock for the "1st".

Her birthday party theme was Minnie Mouse and there were lots of polka dots and zebra prints! So much fun! I can't remember where I got this frame, but I decided to add a few pretty flowers and we used it at the party with a cute baby picture of our birthday girl, Scarlet Rose.
 The flowers were made with my three SU scalloped circle punches and brads. Super easy. I crumpled the paper to give them more texture.
 Three simple flowers added a lot of pizazz to this frame.
Thanks for stopping by my blog today! 

Tuesday, October 23, 2012

Two new double layouts "Sweet" and "All Our Love"

Earlier this year our son and daughter-in-law brought our first grandbaby into this world!!! We are loving being grandma and grandpa. We are so over the moon for this little girl!!! She has filled our world with PINK, ruffles, lace, flowers, and all things sugar and spice for the first time. Having raised two boys, we are thrilled with this new world of all things girley, girl!!

Needless to say she has also changed my scrapping world with fun new girley embellishments and paper colors, that I've never needed before. =)

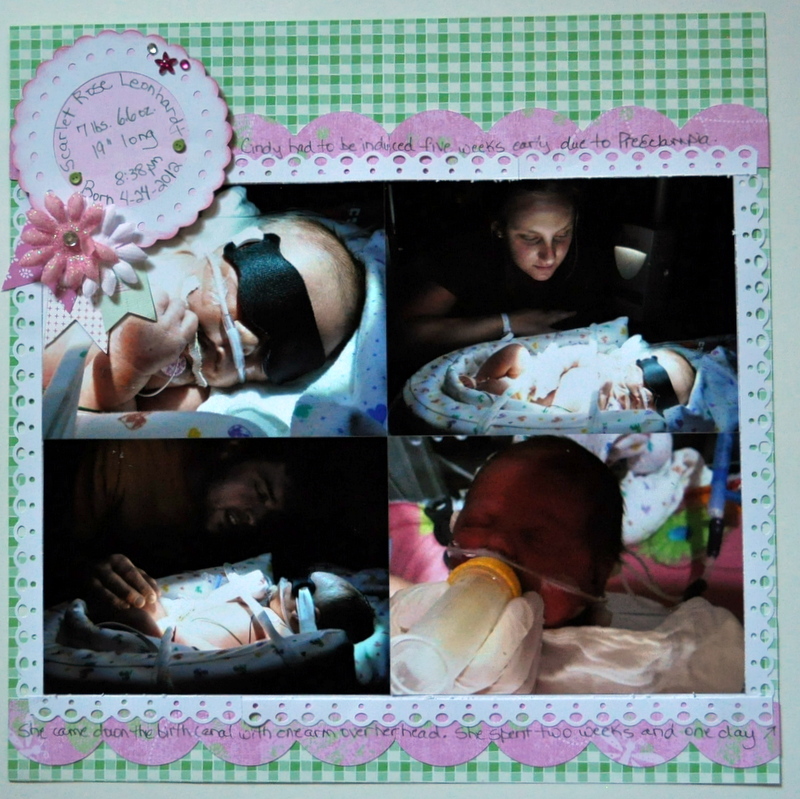
 Our sweet baby girl spent 2 weeks in the NICU. She was 5 weeks early and her lungs had some fluid in them and needed a little more time to mature. It was really hard for us all to see her all wired up, but so thankful that her time there was short!!
 Here she is heading home sweet home.
I had a lot of fun with the banner, flowers, pink owl, and embellies!!!
 
What a treat to snuggle up with this sweetheart. She has captured our heart from day one. Such a snuggly bug!!
 I wrapped bakers twine around a chipboard frame and layered it up with a heart and felt flower. The banner is made from folded over punched circles.
 
The strip along the right side is from the paper stack packaging, Cloud 9 Design.  

Thanks for stopping by my blog today!! I'll be sharing more grandbaby layouts really soon!! Looks like I'll never ever run out of cute pictures to scrap!! We are so blessed!!

Saturday, September 22, 2012

Fall cards: Trees, Flower, & Owl

Time sure has flown since my last post. Life is so good, and very busy! Unfortunately, not much time for craftiness lately.

Purchased the above tree trunk stamp at my BSBFF's garage sale. WIN! Love the way this turned out. Could be used in so many different ways for all of the different seasons. Simple recipe: Stamp 3 different fall colors with a grungy splotch stamp; stamp tree trunks in foreground; dab on clear crackle distressing medium (Tim Holtz) for texture; dry with heat gun.

I made this one awhile back, but never posted. Used one of my favorite new dry embossing folders for the background texture. The stamp, punches, and decorative brad are all SU products. I like all of the layers, and the partial bracket punch in matching cardstock for the sentiment.

This one is actually a baby card, but would also be great for fall. Whooooo doesn't love owls?? The owl and branch are from Hoot n Holler cartridge.

Thanks for stopping by today. Have a fantastic fall weekend. I'm heading to BSU to enjoy a possibly rainy football game with my family.

Wednesday, February 22, 2012

Baby Boy card

Hello! I haven't posted all week, and here it is Wednesday.

Some friends at our church had a baby boy recently, so I thought a cute card was definitely in order. I spotted this card sketch challenge at Paper Secrets. I knew I had to try it with my SU owl stamp and matching punch. I've had these for several months now, and just recently used it for the first time!!! It's so cute.... and now I can't put it down. =)


The blue cardstock is dry embossed with a swiss dot folder. The striped paper has been hanging around in my scrap stash. I stamped the Stampin'Up! owl in Close to My Heart cranberry. I love SU punches and matching stamps! It's so easy and fast to create a card this way. I used another SU punch for the scalloped circle and popped it up with foam adhesive. The baker's twine was cut at about 10" and folded in half, attaching the folded part of the floss on the adhesive behind the blue cardstock. I brought the two ends around and under the owl and tied it at the top. Easy Peasy!! It took me about 20 minutes. Unfortunately, it probably took me 45 to get all my stupplies out and put them back away. =( Some day I'll have a more convenient place to craft.

Thanks for stopping by today!!


Monday, January 16, 2012

Owl birthday card

Hope everybody is starting off their New Year in a positive way! All I can say about mine right now is that I'm really busy at my day job. No complaints, though. I'm so happy to have a job that I love at least 9 days out of 10. =)

Today I have a cutie owl birthday card to share with you.

I made this for my Dad's birthday in December. The stamp is from Tattered Angels. I'm not a huge fan of coloring stamps, but I like the way this one turned out. The edges are all distressed and inked with Tim Holtz pumice stone ink. I cut the sentiment banner freehand. The sentiment stamp is from StampinUp! The patterned paper scraps are My Minds Eye "Bohemian". I used Kraft for the base.

Thanks for stopping by today!

Monday, May 30, 2011

Graduation Cards and my messy scrappy space

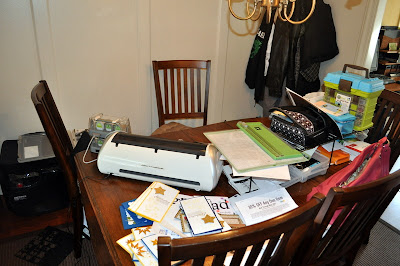
What have you been doing with your 3 day weekend? This picture pretty much sums mine up.

What a mess! We live in a 2 bedroom house so my craft space is in our formal dining room. Apparently, there will be no formal dining going on today, right? I've probably made over 30 cards this weekend! That is a record for me. I haven't worried too much about leaving my stuff out, although it totally sresses me out having a mess like that in open view of the front door! Some day, I will have a craft room...preferably with a door! =)
 
My son has been going to so many graudation open houses. There are about 56 kids in his graduating class and they all know each other. He doesn't want to miss anybody! I decided he shouldn't show up empty handed. These first cards were inspired by one I found in Splitcoast Stampers gallery. I made it my own with the sentiment and star stamps used. These go together really quickly. Yes, I realize many kids will just toss their cards, especially if there is no money in them, but that's okay. These kids have really reached out to my son during his first year at the school. It's tough to change schools as a senior, but for the most part, these kids have been so welcoming. Jacob has had a great year, and I'm happy to make these cards as a gesture of gratitude. 

I bought a package of glitter stars and had no idea that some of the stars on the bottom were humongous. I was able to use them, though, by cutting them in half and finding different placements for them.

I had a bunch of little gold gemstones in my stash which worked well with the star theme. 

My son loved the idea of being able to take a card with him to the open houses, but he said I would need to make a LOT more! So, I did. I changed the dimension on these so that they would fit into some extra envelopes that I already had on hand. I also got smart and cut my own stars with my Cricut using glitter paper. Smart! But, why didn't I think of that earlier before I bought the package of glitter stars? The star is Accent Essentials using the "roly poly" function key. The other change I made was the background distress stamp. It shows up dark in the picture here, but it looks better in person. The other change I made to get them done more quickly is I dotted stickles on some of the stars rather than gemstones. That was much faster and cheaper. Again, hard to see in the photo. I made 10 of these!

This little number was a lot of fun, but quite time consuming. I thought he could give these to some of his closer friends at school. I used my brand new StampinUp! owl punch. I had seen several with the adorable little wings and finally figured out I could use my scallop circle punch by cutting it ino pieces (like a pie). I think it made a great little owl wing!  Then, for the grad hat... I tried cutting a square, but I thought it looked strange, so I cut my squares into diamond shapes, and used a circle punch cut in half for the part that goes on the owls head. Then I used a tiny matching brad, and some floss for the tassle. Cute! It is a little time consuming to glue it all together, but I love the way it turned out, so I made 4 more!

I will have more card posts in a day or two. Have a great Memorial Day. Enjoy your family and take time to think about the freedom that we enjoy thanks to our military and their huge sacrifice. We are so blessed here in the USA!