Showing posts with label rosettes. Show all posts

Friday, February 10, 2012

Valentines Wreath - Rosette Heart

Wow! It's been a really long time and for that...I apologize. I've had some long days at work lately and haven't had any desire to even turn on the computer when I got home.

I made this rosette heart wreath a few weeks back. Today I decided it needed a little something else. I got out some of my supplies, cut a banner out of silver glitter paper with Art Philosophy cartridge, and stamped LOVE... Now it feels done. =)


I strung the banner with black floss and stapled it on to the rosettes.


Now if I can just keep the wreath on the front door.....BONUS! I tend to fly out the door in the morning and the wreath has landed on the ground twice now. =( 

Anybody still planning to make Valentine's cards? I'm still hoping to get a few done. Still wondering how to work that into my schedule. We'll see how it goes.

Blessings!! Thanks for stopping by today!

Saturday, November 5, 2011

Another Rosette Pumpkin

Hello friends! What a beautiful day we've had here in Indiana. The leaves are falling down and the air is fresh and crisp...and I haven't spent any time outside today. LOL! I've been enjoying looking outside while cleaning the house, doing the laundry, paying the bills, and spending time in my crafty space. It's been a great day. My husband has been away all day helping a dear friend with some things around the house, so I've had the day to myself and I've made very good use of it. =) I will admit that doesn't always happen.

The second time around with this pumpkin project from Archivers went soooo much faster. This one is for me and it's sitting on my dining room table right now. I hope I can find the perfect box to store it in so it will be as good as new next fall.

I used striped paper for from We R Memory Keepers, Grandma's Kitchen collection, called "Simple Stripes". I think the best time saver for me was to score all six of the 12 x 12 striped sheets at the 1/2" lines all the way across BEFORE cutting the strips for the rosettes. I was reading some comments on the Archivers site and somebody mentioned scoring it first! Oh my word!!! Why didn't I think of that the first time around. Scoring each strip was quite tedious.

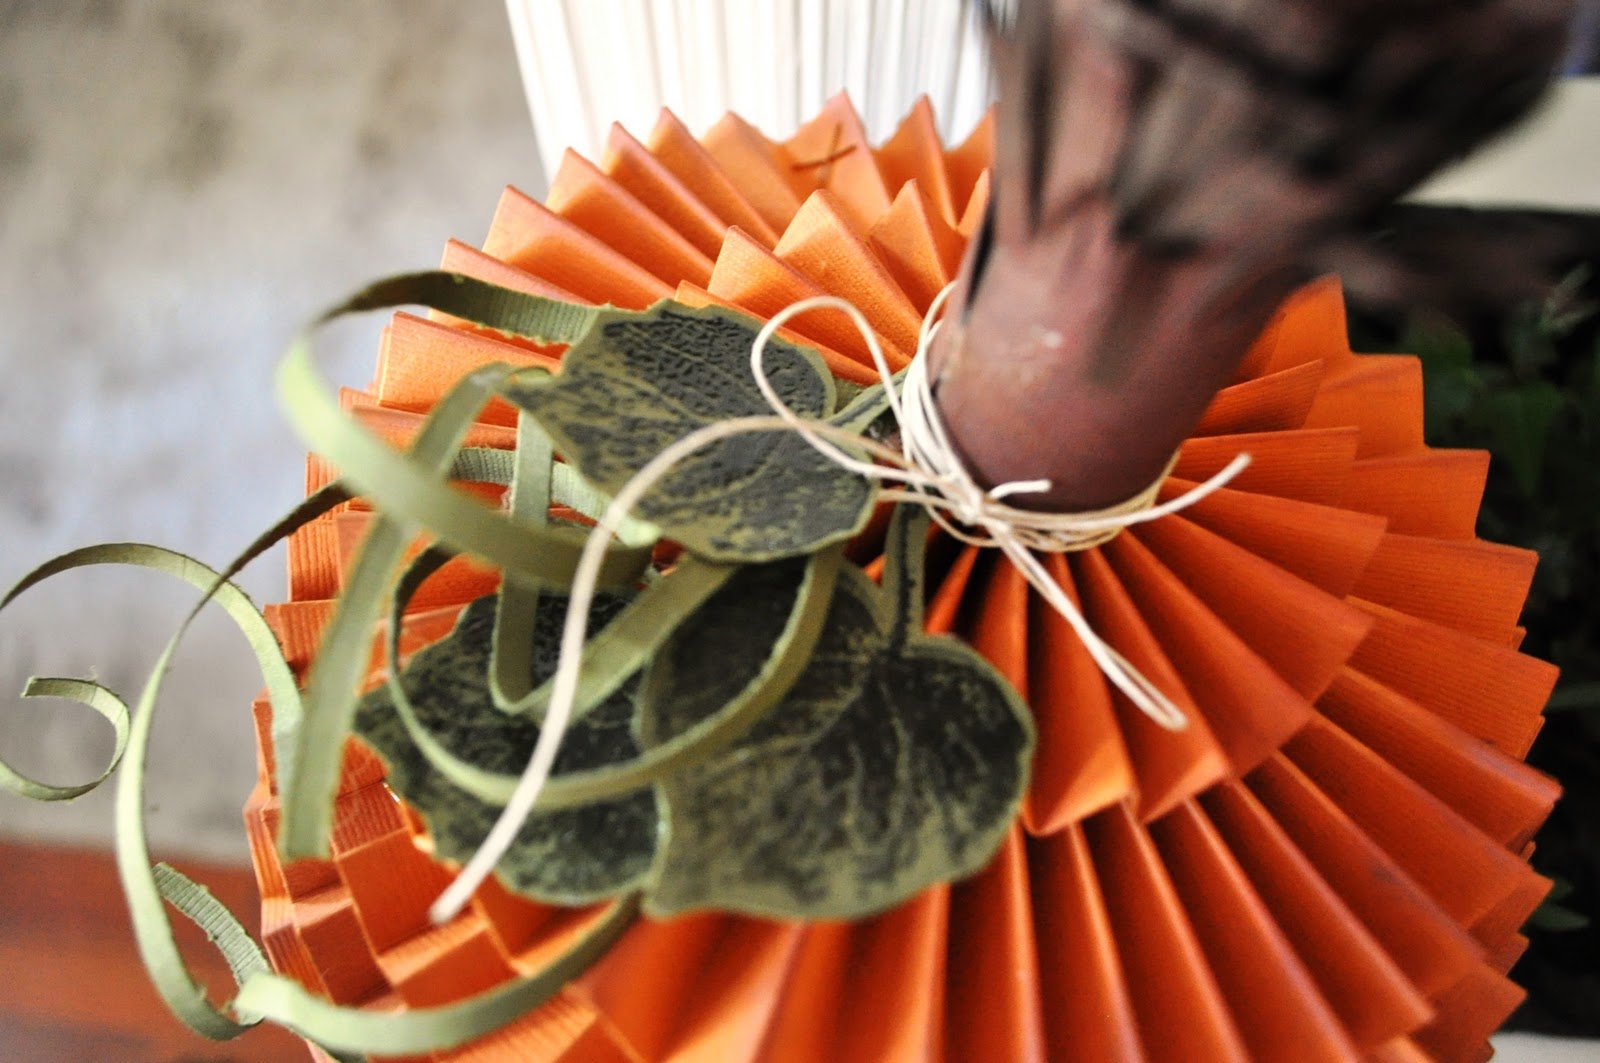
The pumpkin consists of layers of rosettes all stacked up and glued together.

To make the leaves, I stamped the shape of the leaf with VersaMark on olive cardstock. I used bronze embossing powder and heat embossed the leaves, then cut them out and attached them with hot glue.

The curls are made by cutting a 1/8" strip of olive paper and winding it around a pencil. I placed these in a way that they wrapped around the stem. The pumpkin stem is made from three 2 1/2" strips of brown. I fringed one side with Martha Stewart fringe scissors. (If you don't have these yet...they are too fun!) Just keep rolling the strips on top of each other with a dot of hot glue now and then to keep it all together. Attach the stem with hot glue.

I decided to spray it with bronzie Smooch spray just for fun!

Thanks for stopping by my blog today!!! Have a fun and crafty weekend.

Monday, October 3, 2011

Rosette Pumpkin and Fall card

Hello! I am loving the crisp fall air! It's my absolute favorite time of year. The colors are just starting to show and there are no leaves to rake yet. =)

I went to Archivers the other day with my best scrappin buddy and picked up their free project sheet for this cutie patootie pumpkin! I bought the paper that day because I just had to try it. I haven't had much opportunity to scrap or craft and I've been loooonnnnging, to get my goodies out and make something fun.

So here is my finished pumpkin! I love the way it turned out so much that I'm making a couple of more. I'm not sure yet whether I'll vary the size and shape or stick with the instruction sheet. This cutie pumpkin is for my sweet Mom. She had her 78th birthday last weekend. I hope she enjoys looking at it as much as I enjoyed making it!

Each layer is a rosette created using strips of paper and my Martha Stewart scoreboard. Wow! I had never used it before and it was so incredibly helpful for this project. I think I will use it a lot more now! Each strip is scored, edges are inked and the strips are all attached into a circle with little staples. I just happened to have orange ones. Perfect! I used a cirlce punch to cut centers to secure the rosette on the top and bottom. Once all the sizes of rosettes are made, you just hot glue them all together.

The darling stem is also made of strips of paper. I used a wider strip than their instructions called for. I like long stemmed pumpkins! My strips were about 2 1/2 " wide and I used Martha Stewart fringe scissors along the side of each strip. You just roll them up on each other until the strips form a stem in the width that you like. I tied a small piece of twine around the base of the stem. The leaves were stamped with StampinUp French Foliage stamp. I then stamped over the green with Versa Mark ink, sprinkled with clear embossing powder and then used the heat gun. I cut out the three leaves and attached with hot glue. The green strips are 1/8" and curled with a pencil.
Thought I'd make a card for my Mom while I had all of my supplies out. I had already sent her flowers and a card for her birthday, so I decided to make this more of a "happy fall" card. I stamped the leaves in different colors, then went back over the green leaf with clear embossing powder, and the two oak leaves with broze embossing powder.
Thanks so much for looking! Have a great week!

Tuesday, July 12, 2011

"Hello Dolly" #2 scrapbook layout

Hello scrappy friends! Hope you are all enjoying some sunshine wherever you are today.

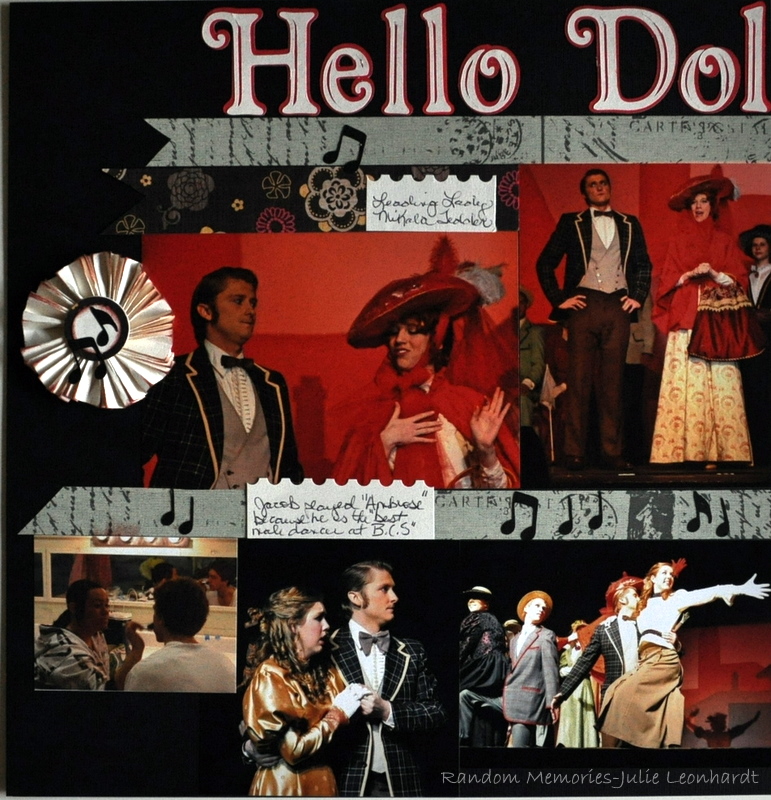
Today, I'm sharing another layout from the musical Hello Dolly. I previously shared a layout that I made for his album. I had so many great pictures left, that I made a layout for the family album.

The title is from the Winter Woodlands cartridge. It's one of my favorite "fancy" fonts. The top layer is cream and the bottom layer is red. I made a rosette by folding strips of paper accordion style and attaching it to a punched circle. I inked the edges and added some musical notes cut with the Quarter Note cartridge.


The masking tape is Tim Holtz. I added another strip of wallets for the pictures of the waiter routine! These guys were amazing! The journalling spots were simple rectangles. I punched one side with the Fiskar's postage stamp border punch just to give it some detail. The patterned paper strips which are really hard to see are Cloud 9 Design. I added a couple of plain white flowers and inked the edges and added an antique-looking brad


Have a wonderful day! Thanks for stopping by. =)

Monday, June 27, 2011

"Senior Chapel" layout

Hello everybody! I just got back from the grocery store and I'm squeaking in a quick post of a recent layout. This is another one for my son's album.

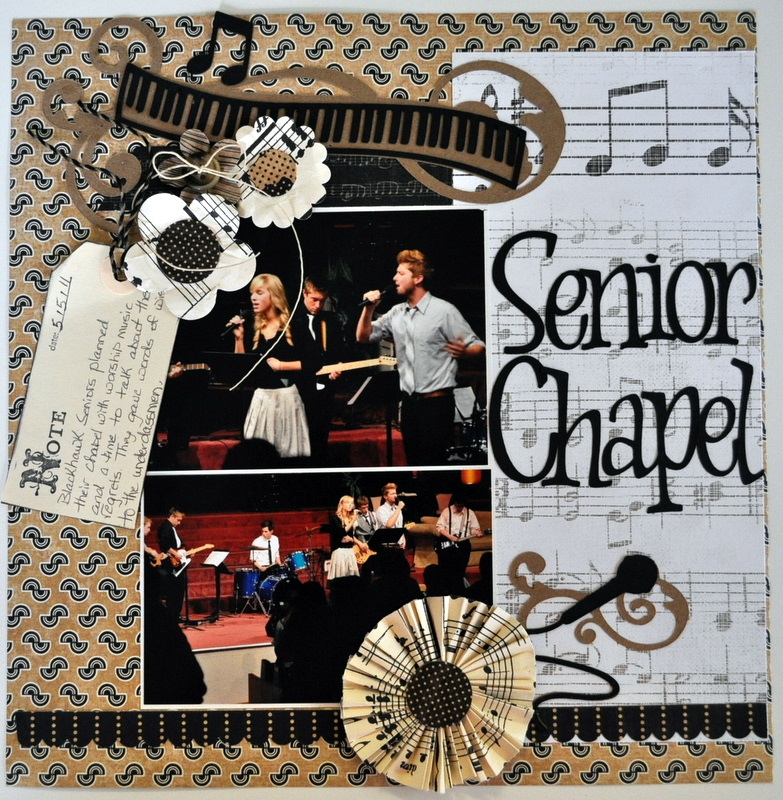
Jacob really enjoys music, especially singing. He was helping lead the chapel hosted by the senior class at his school. Of course, we went to show our support and snapped a few pictures for the album. =)

The patterned papers and border strips are Graphic 45 and Stampin Up!  I went totally crazy with my Quarter Note cartridge (Cricut). I have used this cartridge so often.

I cut the keyboard out of Kraft and black paper...then layered on the flowers. The journalling tag is stamped with Notes and Details set. There are a couple of different twines, a button and a purchased flowe woven in here too.

The treble clef is also from Quarter Note. I tried my hand at a couple of rosettes. I love the look, but they really take up space in the scrapbook. I smooshed mine down a little bit. =)

Here aresome closeups so ou can see a little bit more of the details.


The microphone is another cut from Quarter Note along with all of the musical notes scattered across the page.
 

Blessings!! Have a scrappy week!