Showing posts with label Spring. Show all posts

Thursday, March 7, 2024

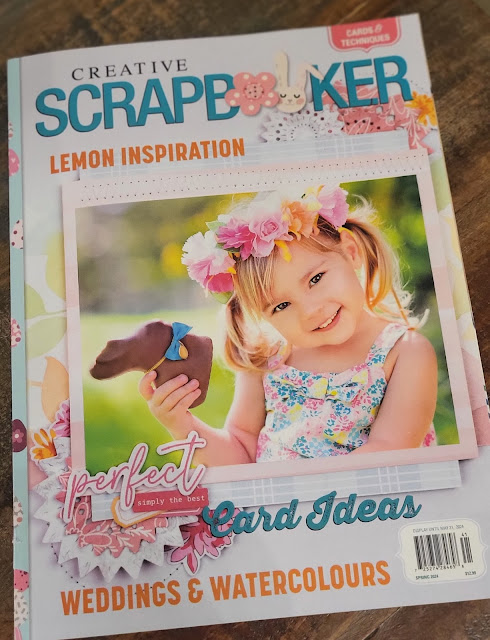
Published Layout - Spring 2024 Creative Scrapbooker Magazine


Hello friends! I'm super excited to share this bit of news with you. My layout "Happy Place" was selected to be published in the Spring 2024 issue of Creative Scrapbooker magazine!!! This issue is stunning and full of all kinds of inspiration. You can check me out on page 116!

This layout features photos of me in my scrapbook/office space! We built and moved into our home at the end of 2017 and was blessed with my very own dedicated crafting space for the first time in my life! It truly is my "happy place". I still work a full time job, but love the moments I can get in there and play around with all my crafty stuff. The layout also reminds me to practice self love. These photos of me turned out okay, but who knew they'd show up on a published layout. Yikes! 

If you've never checked out one of their magazines, you definitely are missing out! You can view a super quick online preview here and scroll down to the short video. Every page of this issue is full of colorful inspiration and will feed your longing for sunshine and all the Springy things.

Thanks for stopping by my blog today. Have a blessed and crafty week!


Thursday, May 13, 2010

Remember the candy wrapper flowers?


I realize we're well past Easter, but you can't scrap it until it's over, right? And..I don't get to scrap every day, so try to cut me some slack. Thanks! =)

Here is a layout using pictures that the three of us took together on our patio in the back yard. It was a lovely spring day and the flowers were made for this layout.
Here are some close ups of the butterflies.
You will notice Joel is missing and my journalling speaks to that....Becoming Three...After church he was off to an event with his fiance's family. Guess this will take some getting used to, just as it did when it was just Mark and I getting used to the idea of adding baby Joel to the family. Now he's all grown up. Big sigh...OK enough sap for one post. Thank goodness for Jacob filling in the gaps with sillyness. Silly boys! I've been blessed with two of them.

Thanks for looking and have a lovely Friday tomorrow!

Wednesday, May 12, 2010

Mother's Day card


Hope all of you Mom's had a great Mother's Day! I know that I did. I was unable to be with my Mom, but my husband and boys were very good to me and we spent most of the day together!

Took me awhile to post this, but I snapped a quick picture of this before sending it to my Mom in time for her to get it for Mother's Day. I followed a sketch on the PageMaps blog.

The shape punch, sentiment stamp, and the cute felt flowers are from Stampin Up. The border punch is the Fiskar's bracket punch. I punched the shapes from the sample blocks on the cover page for a small packet of papers. Perfect way for all of the papers to match and I didn't have to cut into a 12 x 12 except for the base of the card. I love that about cards! Love to use those scraps!

Thanks for looking!

Saturday, April 10, 2010

Easter---Trash to Treasure

I got a crazy little idea a few days ago while I was eating a Nesltes mini chocolate egg. I thought the wrappers were kind of pretty and springy looking. Why not make some flowers out of these for my Easter layouts? I have never made my own flower embellishments before. I hope you like my idea!Here's what you need: colorful candy wrappers which have been gently unwrapped and flattened(eat the chocolate!), tiny little plastic gem flowers to use for the flower middles, adhesive sheets (sticky on both sides), white cardstock, scissors, Mod Podge, flower stamps (optional)
Take the white paper off of the double stick adhesive sheets.
Lay the flattened candy wrappers on the adhesive sheet where you just removed the white paper. Rub your hands over the entire surface of the wrapper to make sure it is well adheared. It's okay if there are a lot of wrinkles in the wrapper because it adds a great textured look to your flower.
Carefully remove the brown (back side) of the adhesive paper.It will now be sticky on the bottom and the foil will be on the top side.
Then lay the sticky side of the project down on white card stock.
Use your scissors to cut the wrappers apart from each other.
I cut my flowers free-hand, but if you want them more unifom, turn the rectangle foil side down and stamp the flower image on the the backside of the cardstock, then cut around your image. In order to shape the flower you will need to cut into the center a little between each petal, then gently fold up all of the petals around the center.
Then gently form each petal by round the edges down. Add your gem to the center.
Lay them out on wax paper and brush heavily with Mod Podge. Let them dry for an hour. The Mod Podge will dry clear and harden each flower up so they are not so fragile. Save them in a non-crushable container and use them in a scrapbook or make a fun card! Enjoy! Thanks for looking! Please let me know if you try it.