Showing posts with label VersaMark ink. Show all posts

Monday, October 3, 2011

Rosette Pumpkin and Fall card

Hello! I am loving the crisp fall air! It's my absolute favorite time of year. The colors are just starting to show and there are no leaves to rake yet. =)

I went to Archivers the other day with my best scrappin buddy and picked up their free project sheet for this cutie patootie pumpkin! I bought the paper that day because I just had to try it. I haven't had much opportunity to scrap or craft and I've been loooonnnnging, to get my goodies out and make something fun.

So here is my finished pumpkin! I love the way it turned out so much that I'm making a couple of more. I'm not sure yet whether I'll vary the size and shape or stick with the instruction sheet. This cutie pumpkin is for my sweet Mom. She had her 78th birthday last weekend. I hope she enjoys looking at it as much as I enjoyed making it!

Each layer is a rosette created using strips of paper and my Martha Stewart scoreboard. Wow! I had never used it before and it was so incredibly helpful for this project. I think I will use it a lot more now! Each strip is scored, edges are inked and the strips are all attached into a circle with little staples. I just happened to have orange ones. Perfect! I used a cirlce punch to cut centers to secure the rosette on the top and bottom. Once all the sizes of rosettes are made, you just hot glue them all together.
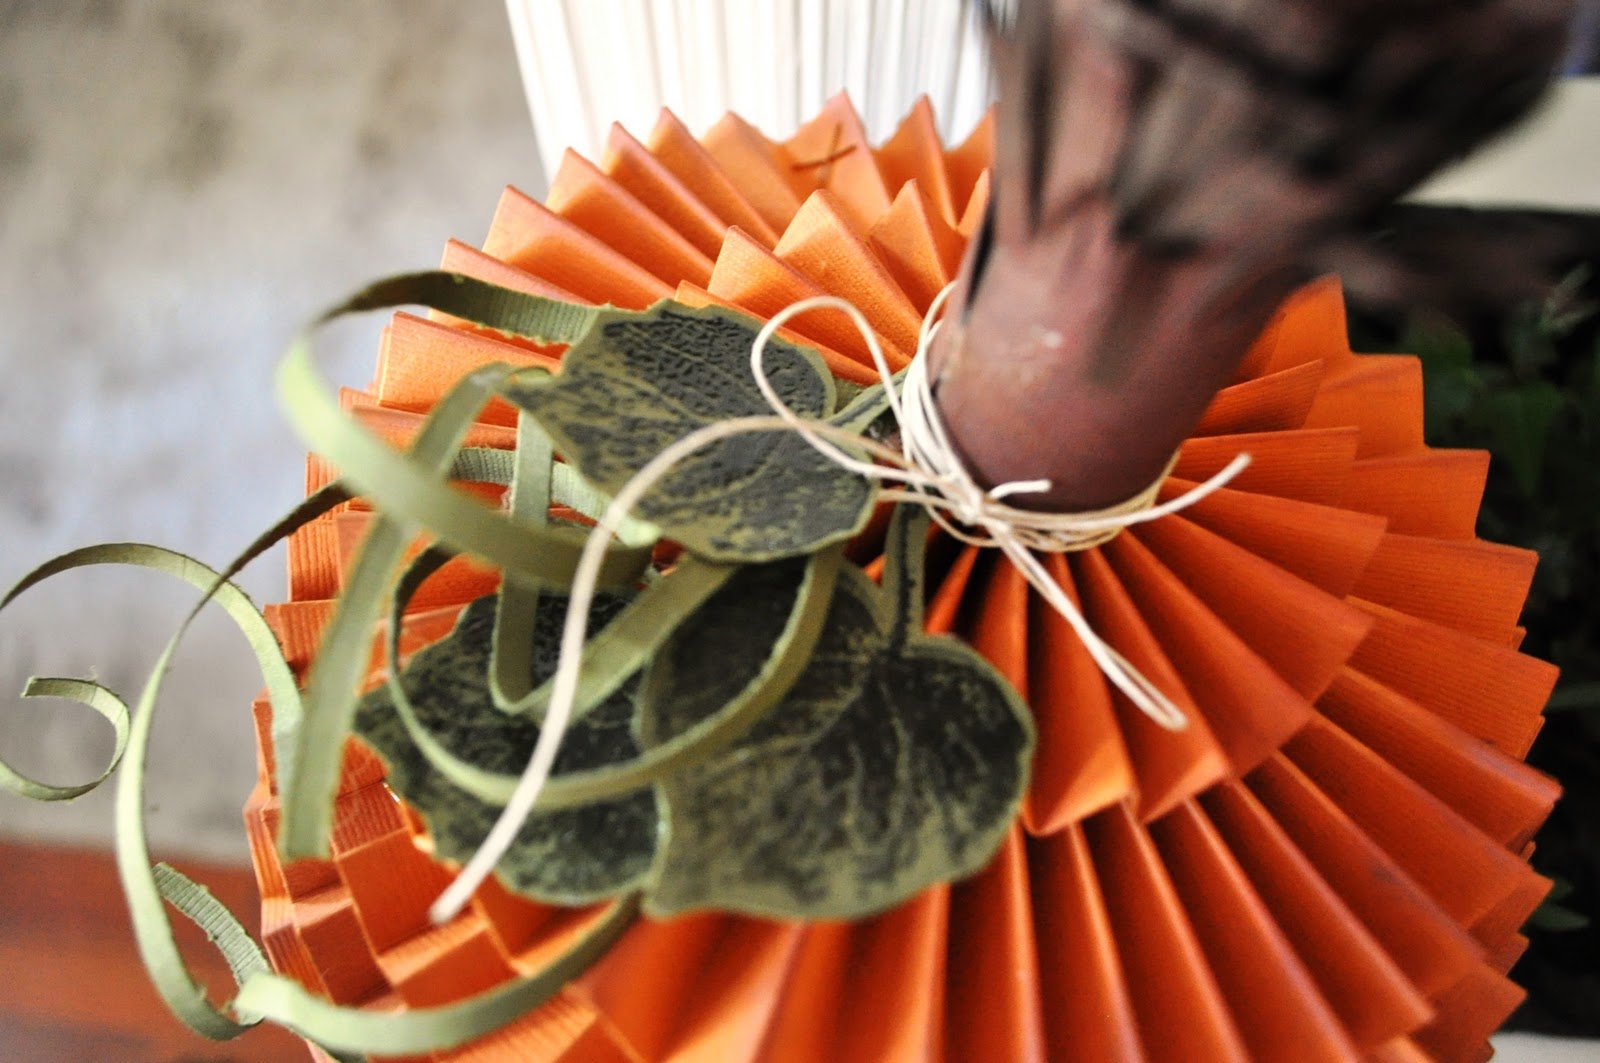
The darling stem is also made of strips of paper. I used a wider strip than their instructions called for. I like long stemmed pumpkins! My strips were about 2 1/2 " wide and I used Martha Stewart fringe scissors along the side of each strip. You just roll them up on each other until the strips form a stem in the width that you like. I tied a small piece of twine around the base of the stem. The leaves were stamped with StampinUp French Foliage stamp. I then stamped over the green with Versa Mark ink, sprinkled with clear embossing powder and then used the heat gun. I cut out the three leaves and attached with hot glue. The green strips are 1/8" and curled with a pencil.
Thought I'd make a card for my Mom while I had all of my supplies out. I had already sent her flowers and a card for her birthday, so I decided to make this more of a "happy fall" card. I stamped the leaves in different colors, then went back over the green leaf with clear embossing powder, and the two oak leaves with broze embossing powder.
Thanks so much for looking! Have a great week!

Saturday, June 18, 2011

"School Days" scrapbook layout

Hope you're all enjoying a wonderful weekend. Today is my son's graduation open house. I'm probably running around like a crazy person right now, so thankfully I scheduled this post in advance!

Today, I'm sharing a recent layout that I completed showing my son from Kindergarten through his Senior year. The intentions were to include only pictures taken on his first day of school. We actually did take their picture every first day of school. However, we had a killer computer virus last fall and lost several years of pictures, so I had to make due. The moral of the story is ALWAYS back up your digital photos!

Here's a closer view of the left page. It's so funny to look at these. Jacob (the blonde) typically has a smile on his 1st day of school photos. However, Joel, usually looks much less than excited. There wasn't a whole lot of room for embellishments, so I simply cut out a bunch of apples with my Cricut, inked them up on the edges and used a number sticker to identify the year. You can see a little bit of the background stamping I did with white ink to give it a more distressed look. The penmanship stamp is from Glitz Design and the texture stamp is StampinUp!

I cut a tree and used my scallop punch to create bunches of leaves in the tree top. The tree bark look was created with VersaMark on Kraft paper and the same StampinUp! texture stamp. Oh....make sure you take a close look at grade 10! Don't you love the super long hair? I didn't actually mind it at the time, but I much prefer the short clean cut look they have now.


Here's a little closer view.


Have a great weekend and thanks again for stopping by my blog today!

Sunday, April 3, 2011

"Colorful Side Shows" layout and Giveaway!!

Happy Sunday! After church, we spent quite a bit of time and gas running around town for stuff. Gas is up to $3.85 here!!! I got home just in time to photograph the projects I made on Friday. I especiallly wanted to share this layout featuring the GlitzDesign distressing stamp set that I'm giving away here on my blog.

These pictures are from our 10 day 25th anniversary cruise we took this past December. It was our first cruise ever and we LOVED it! Anyway, back to the layout. Here is the left side:
You may have to double click the layout to see how I used the stamp in the upper section on the turquoise paper. I used the bottom of the five stamps which is a map and VersaMark ink pad. I love the dimension and detail it added to my layout.

Here is the right side of the layout. You can see a the stamped map on the top a little more clearly. 
The paper I used on the bottom is K & C company travel log. I enjoyed being able to journal right on the travel log which is printed on the paper. Easy! Fell in love with the antique brads from StampinUp.

I used two different titling fonts, both cut with my Cricut machine and Lyrical Letters cartridge. The tabs were punched with the decorative labels punch from StampinUp. I cut each label in half lengthwise and inked the edges for definition.

Here are the two pages side-by-side:

You will love this stamp set for both scrapbooking and card making. I have a brand new, unopened set looking for a good home. LOL! If you haven't yet done so, go back to this post about the blog candy and get yourself in the running to win it!